IX.1.20 Pompeii. House of M. Epidius Rufus or House of Diadumeni.
Linked to IX.1.30. Excavated 1858 and 1866. Bombed in 1943, restored by 1946.
Part 1 Part 2 Part 3 Part 4 Part 5 Part 6 Plan
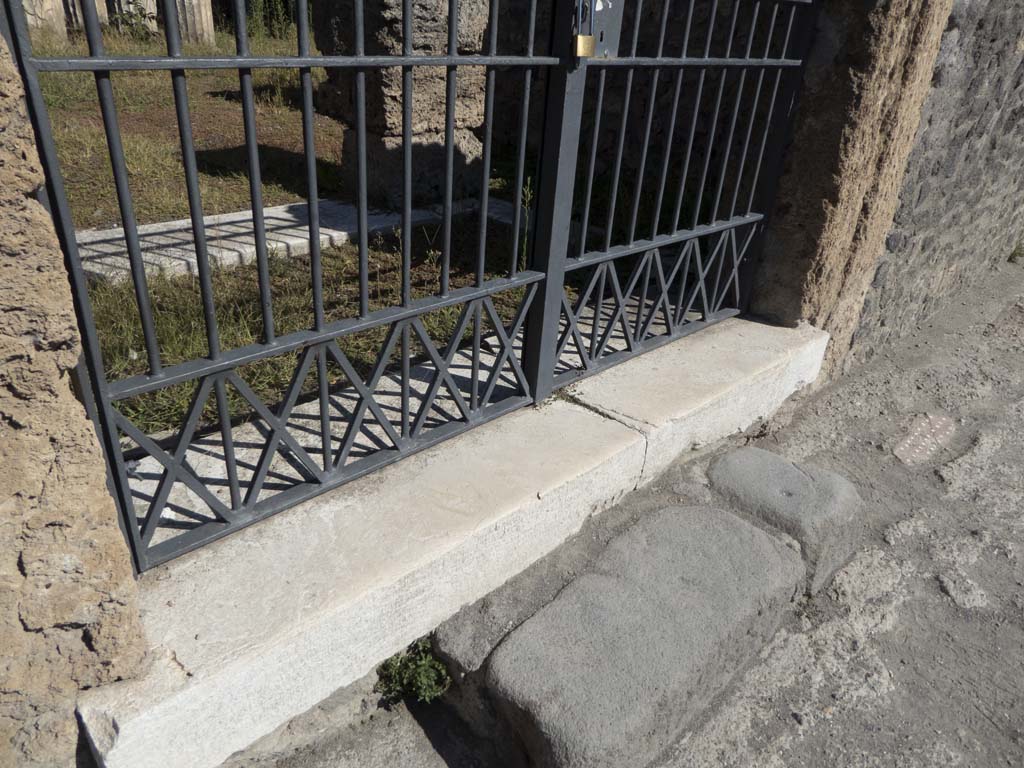
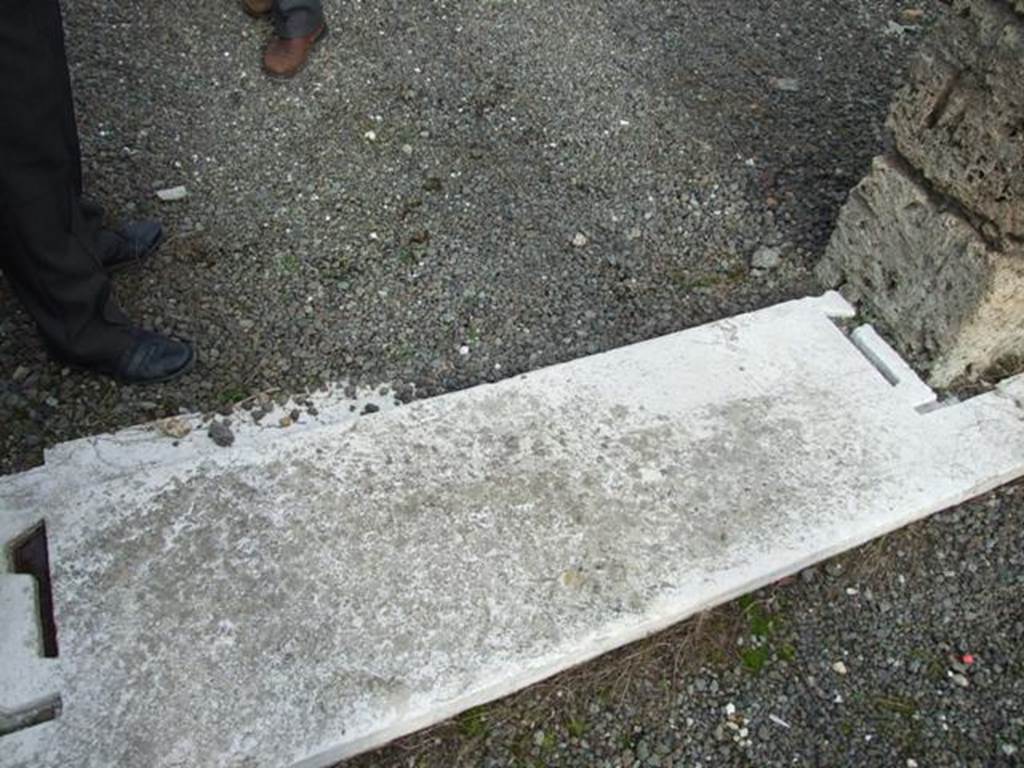
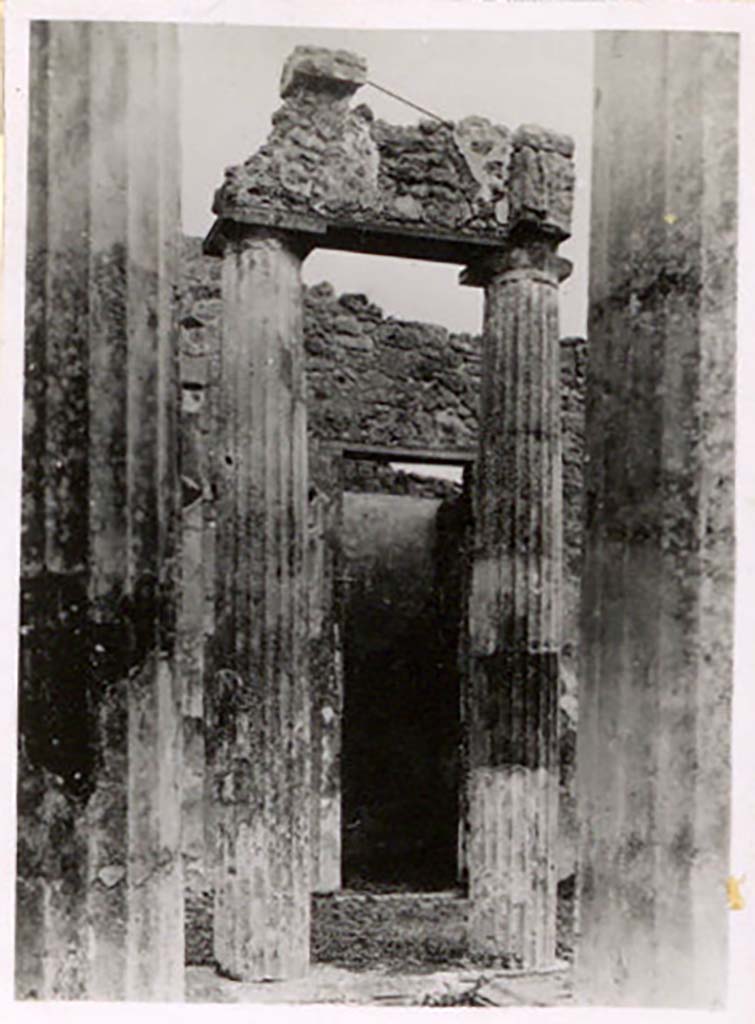
IX.1.20 Pompeii. September 2017. Entrance doorway threshold with
step.
Foto Annette Haug, ERC Grant 681269 DÉCOR
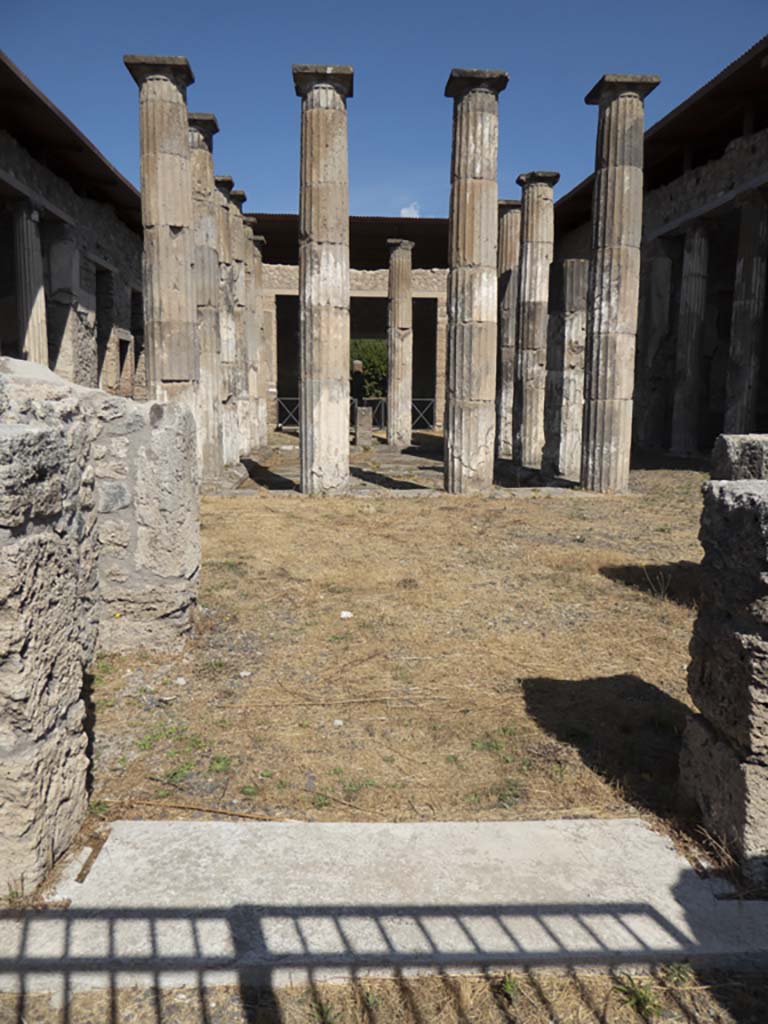
IX.1.20 Pompeii. September 2019.
Looking west along podium towards remaining
flooring and step to entrance doorway.
Foto Annette Haug, ERC Grant 681269 DÉCOR
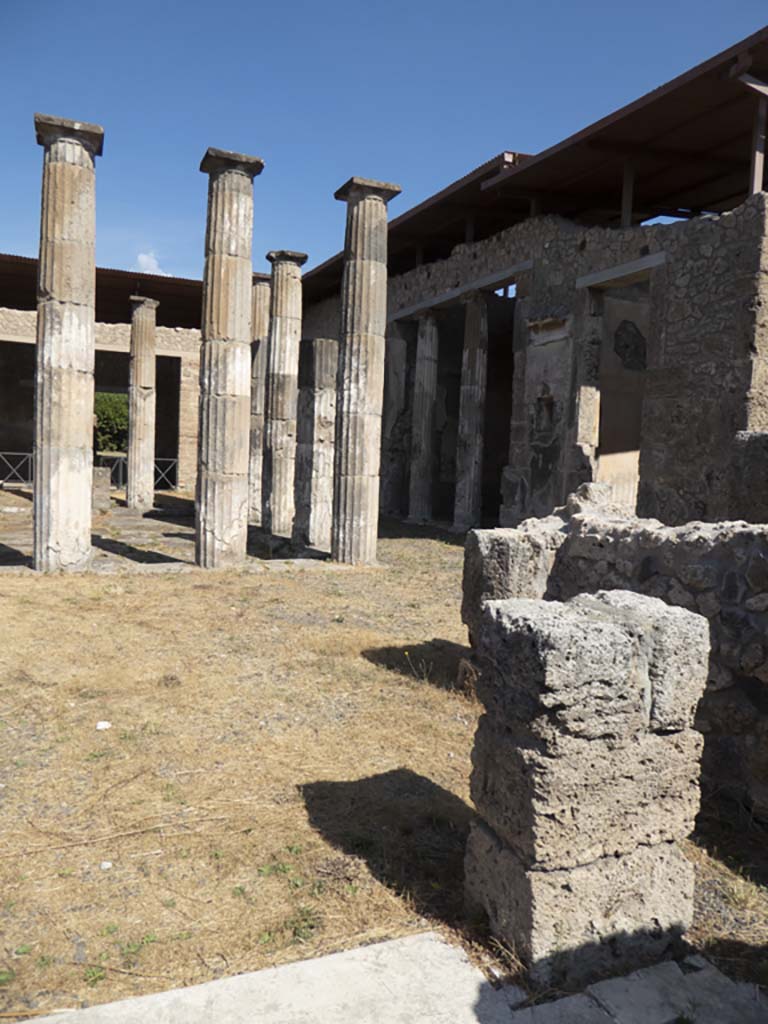
IX.1.20 Pompeii. September 2019.
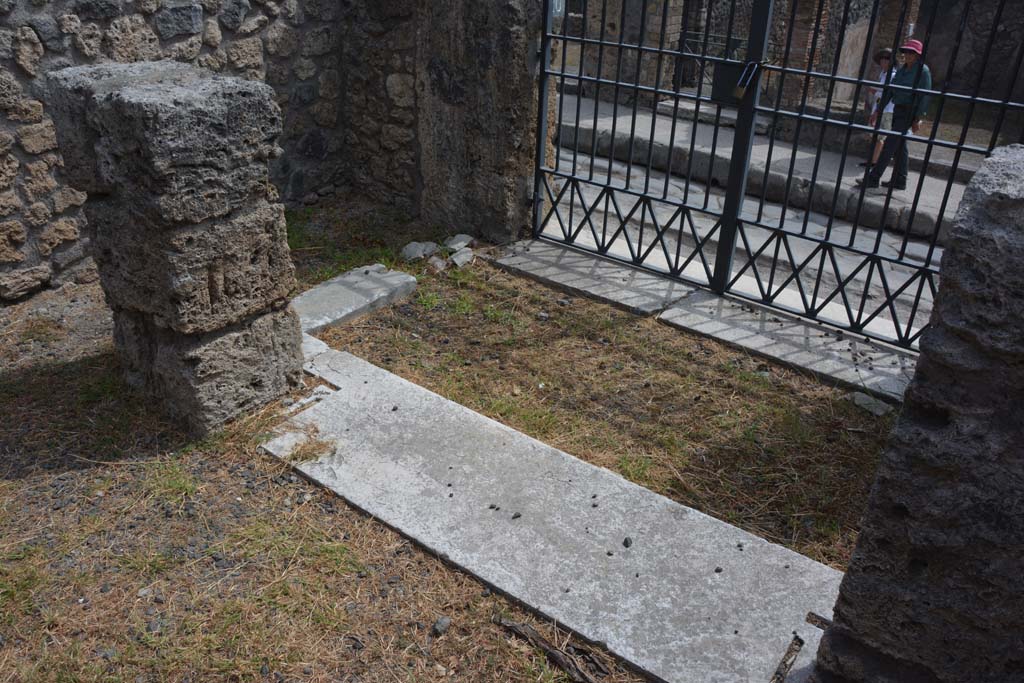
Looking south-east across entrance
vestibule, with threshold into small lobby/room on east side of entrance
doorway.
Foto Annette Haug, ERC Grant 681269 DÉCOR
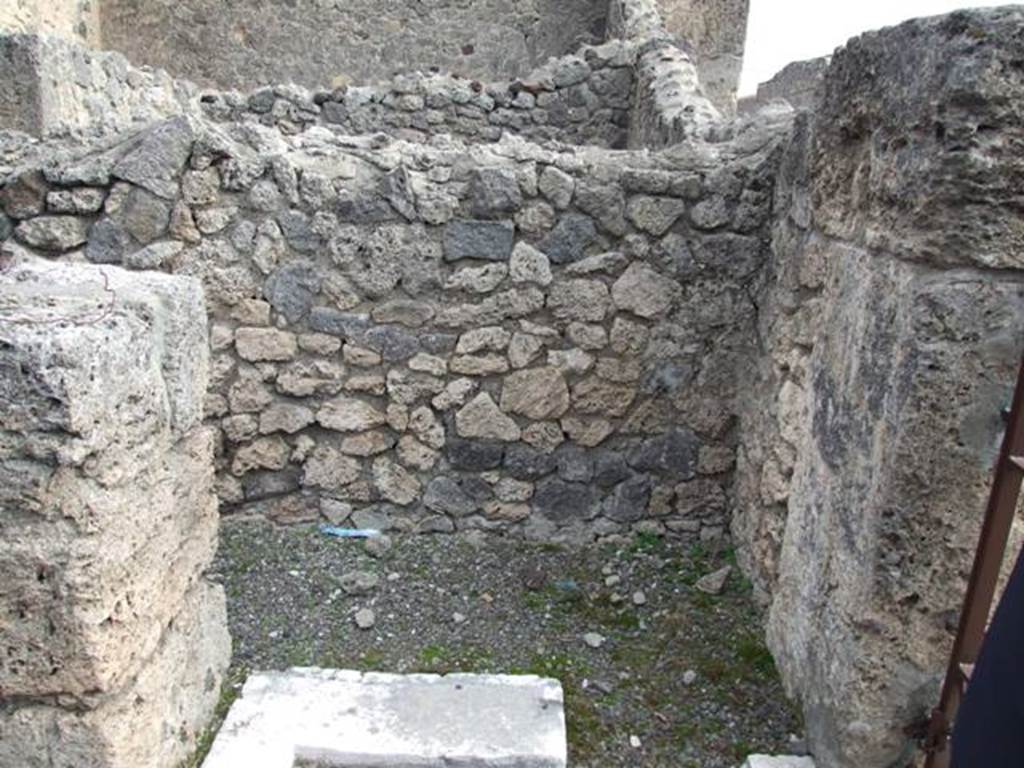
IX.1.20 Pompeii. December 2007. Room 1, small lobby on east side of the fauces.
A small door allowed entry when the house door was closed, and which made an alcove when it was opened.
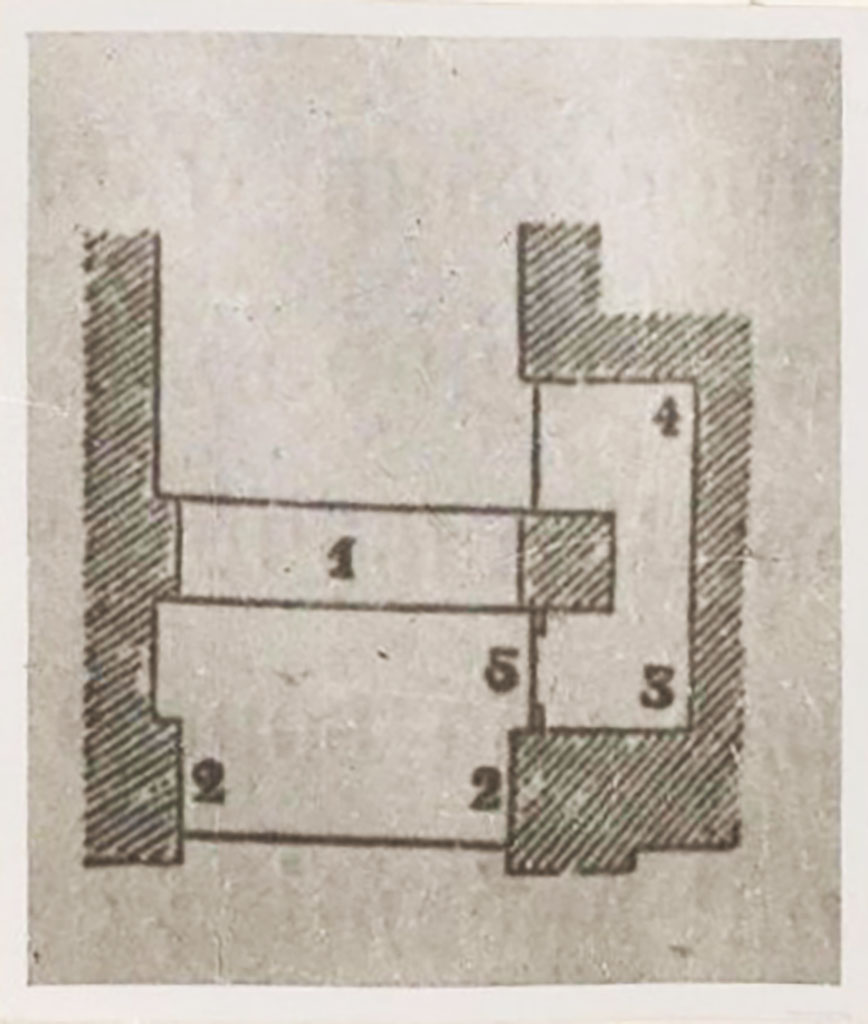
IX.1.20 Pompeii. Pre-1943. Drawing and photo by Tatiana Warscher.
According to Warscher – “The grand door (1) was behind the pilasters (2), a passage (3-4), hidden behind the wall to the right, permitted entry into the house by a small door (5) without having to open the main door.
This passage was closed on the roadside by a small door, of which some ironwork could still be seen.”

IX.1.20
Pompeii. September 2019. Marble sill at entrance doorway, looking north.
Foto Annette Haug, ERC Grant 681269 DÉCOR
IX.1.20 Pompeii. December 2007. Marble sill at entrance doorway.
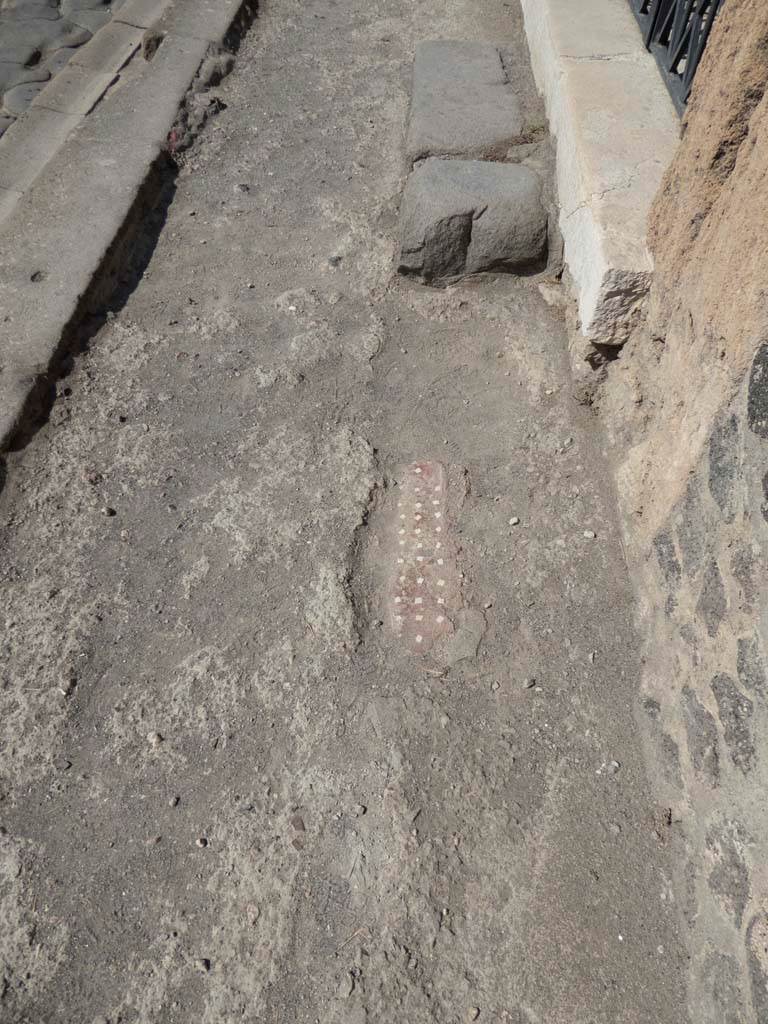
IX.1.20 Pompeii. September 2017. Looking north across entrance
threshold
Foto Annette Haug, ERC Grant 681269 DÉCOR

IX.1.20 Pompeii. September 2017. West side of entrance threshold.
Foto Annette Haug, ERC Grant 681269 DÉCOR
IX.1.20 Pompeii. September 2017. East side of entrance threshold.
Foto Annette Haug, ERC Grant 681269 DÉCOR
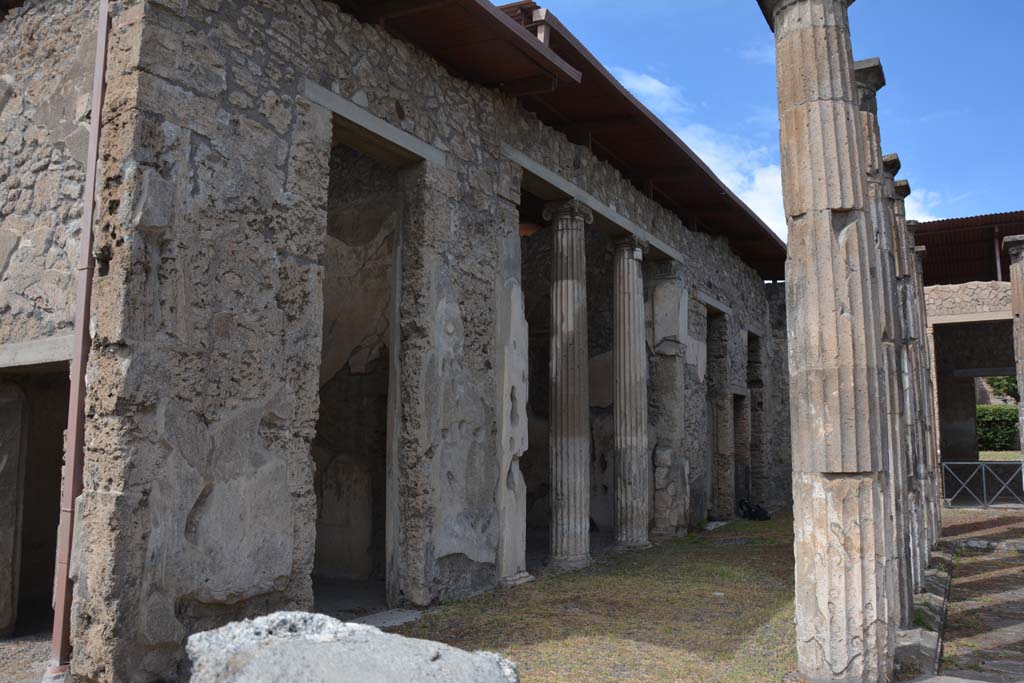
IX.1.20 Pompeii. May 2024. Room 2, looking north across atrium. Photo courtesy of Jeannette Armstrong.
IX.1.20 Pompeii.
August 2023. Room 2, looking north across atrium. Photo courtesy of
Maribel Velasco.

IX.1.20 Pompeii. August 2021. Room 2, looking north across atrium.
Photo courtesy of Robert Hanson.
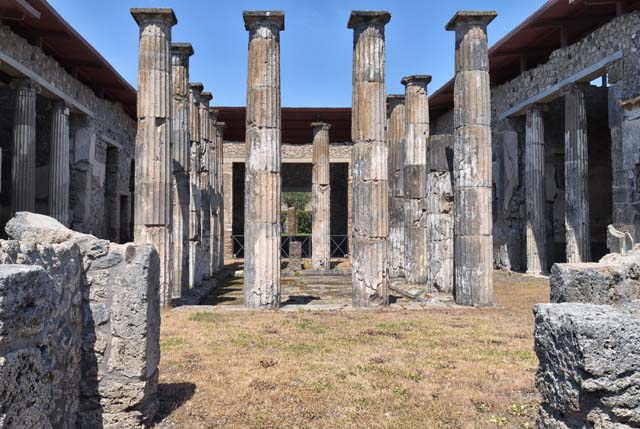
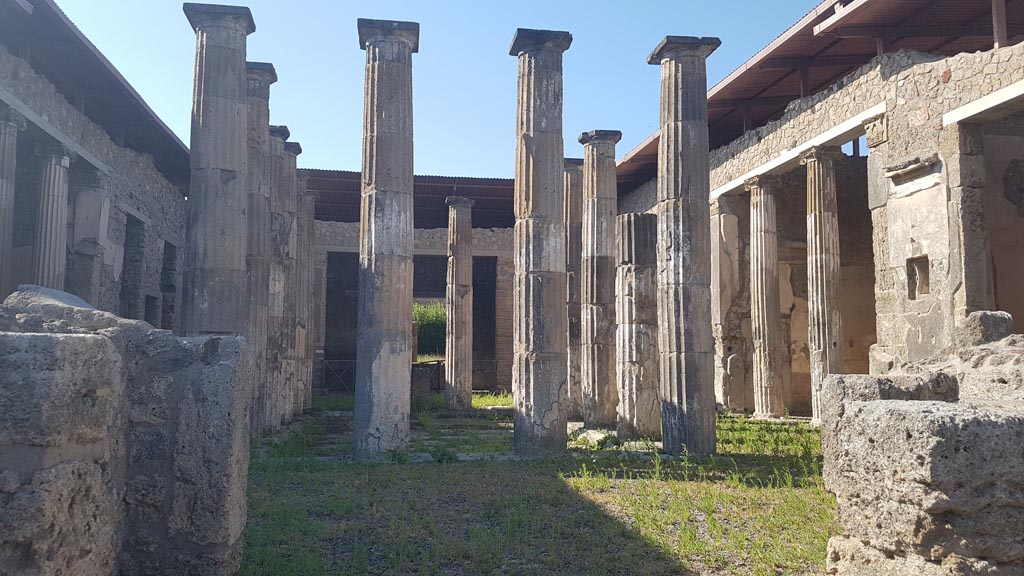
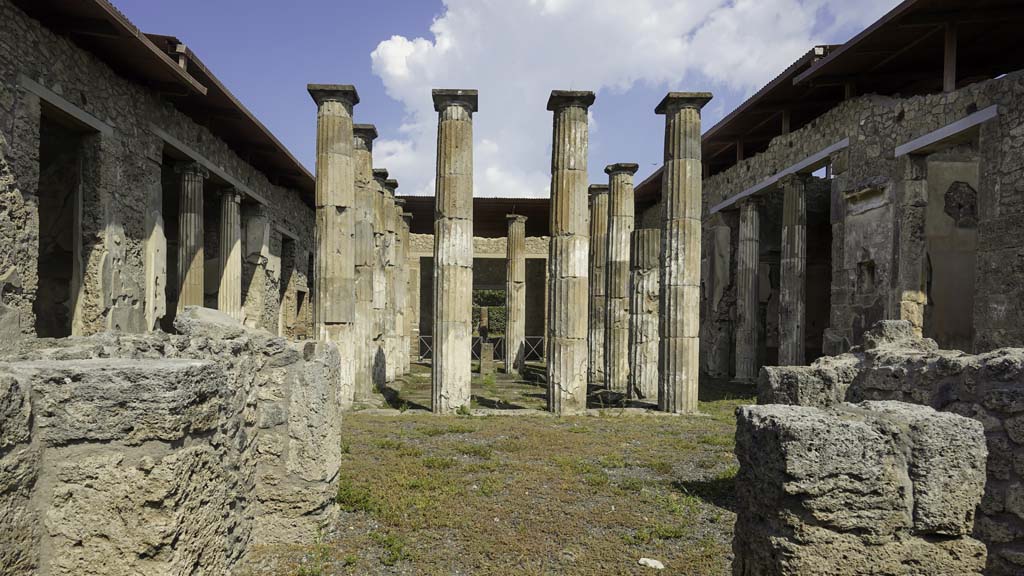
IX.1.20 Pompeii. September 2019.
Room 2, looking north across atrium.
Foto Annette Haug, ERC Grant 681269 DÉCOR
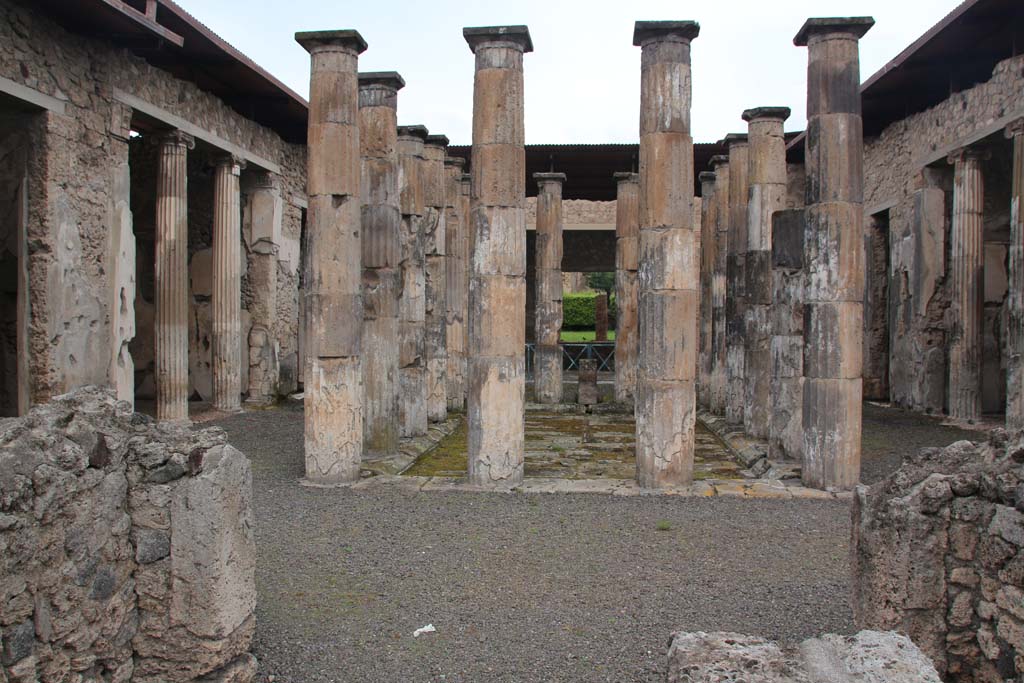
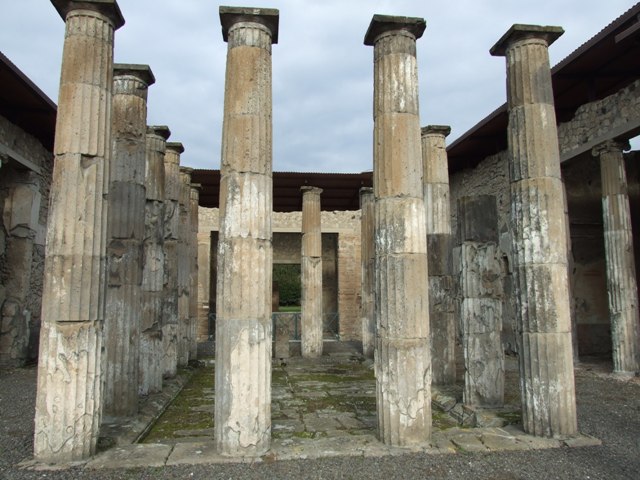
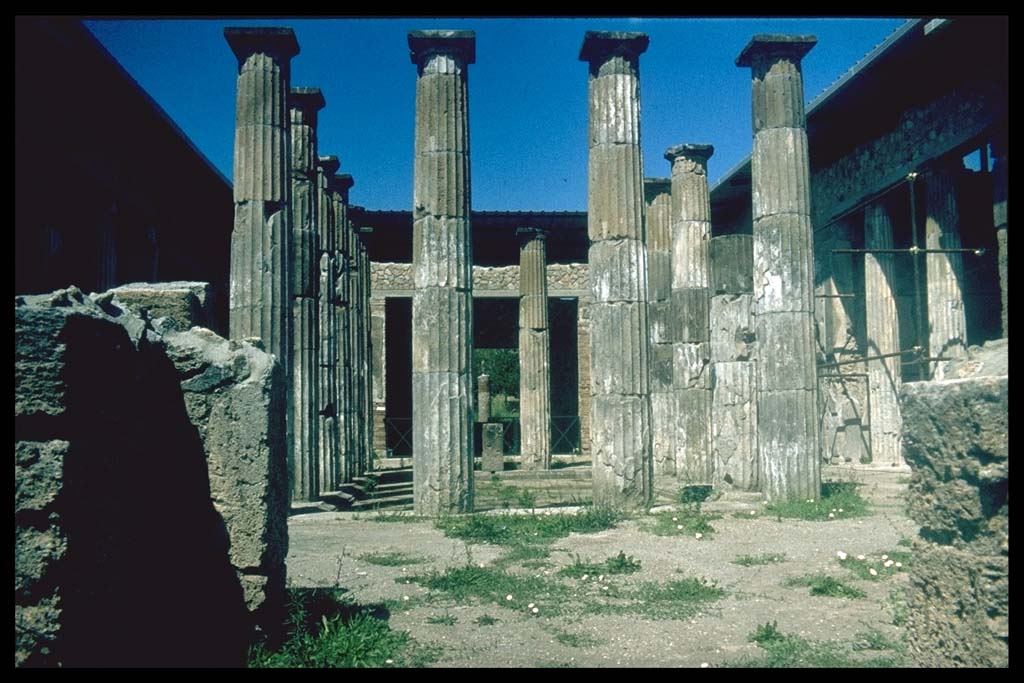
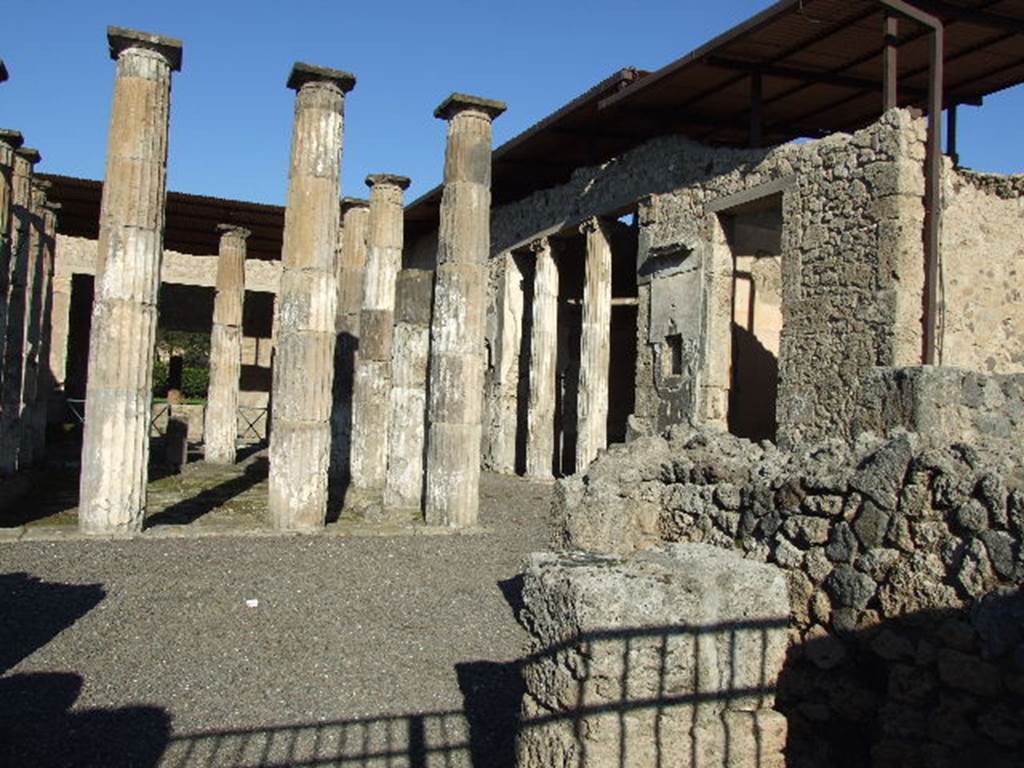
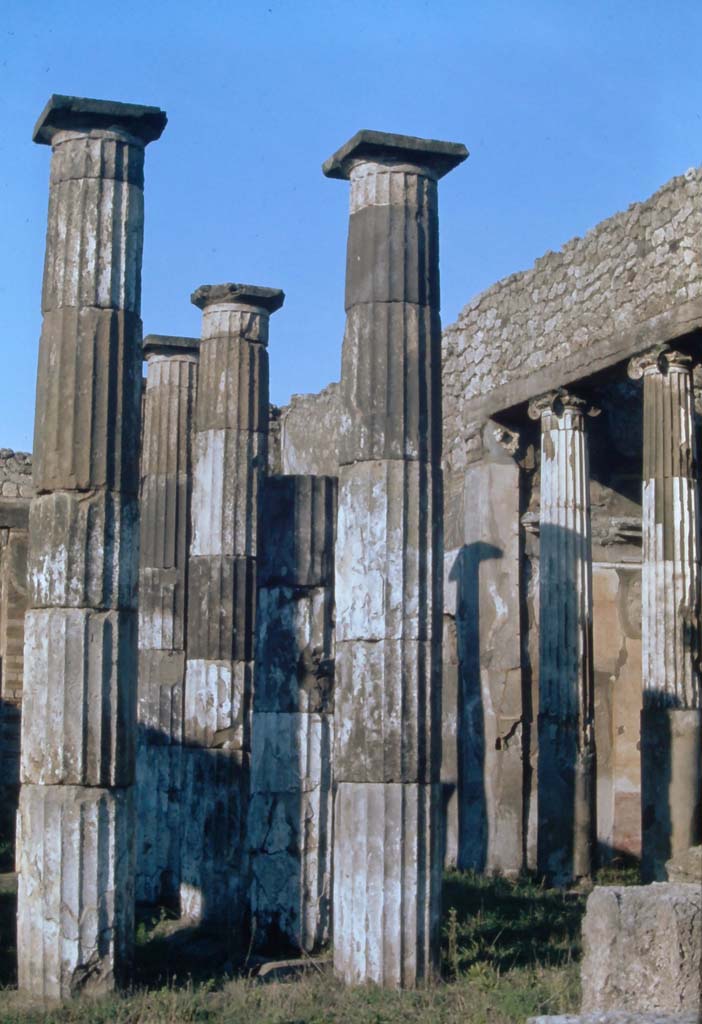
IX.1.20 Pompeii. April 2018. Room 2, atrium, with 16 Doric tufa columns around impluvium, rim and basin floor.
Photo courtesy of Ian Lycett-King. Use is subject to Creative
Commons Attribution-NonCommercial License v.4 International.

Room 2, atrium, with 16 tufa columns around impluvium, rim and basin floor. Looking north. Photo courtesy of Klaus Heese.

IX.1.20 Pompeii. September 2019.
Room 2, looking north across impluvium in atrium.
Foto Annette Haug, ERC Grant 681269 DÉCOR
IX.1.20 Pompeii. September 2019. Room 2, detail of impluvium,
looking north.
Foto Annette Haug, ERC Grant 681269 DÉCOR
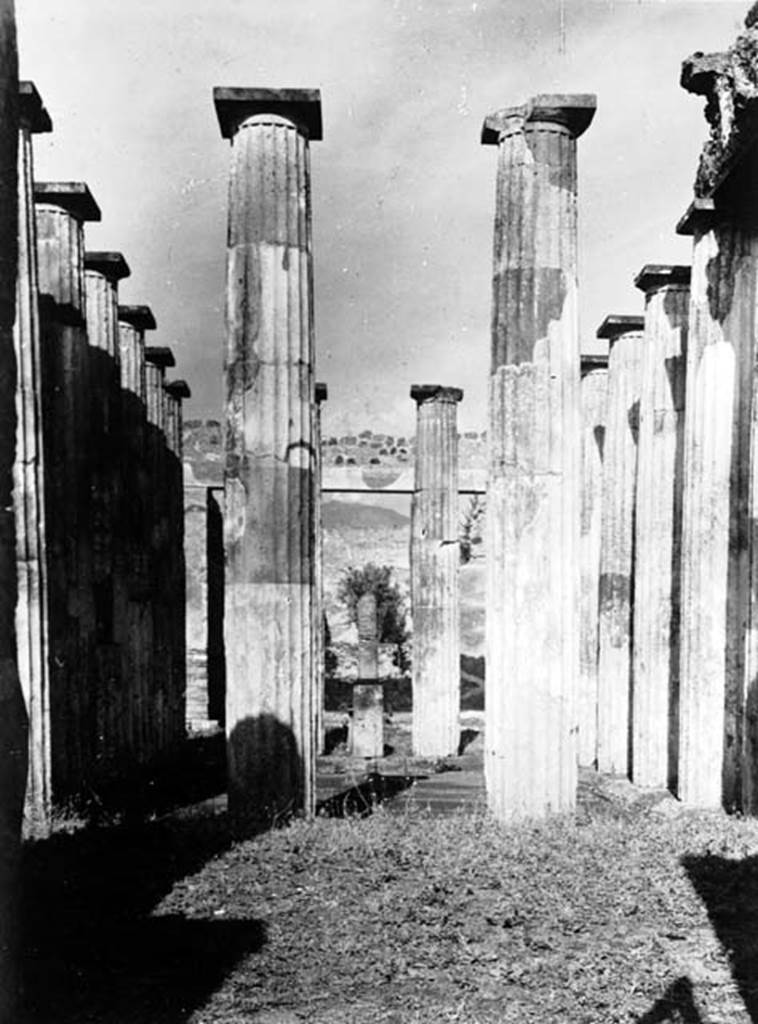
IX.1.20 Pompeii. December 2007.
Room 2, atrium. Tufa columns, impluvium, rim and basin floor. Atrium with 16 Doric columns around impluvium.
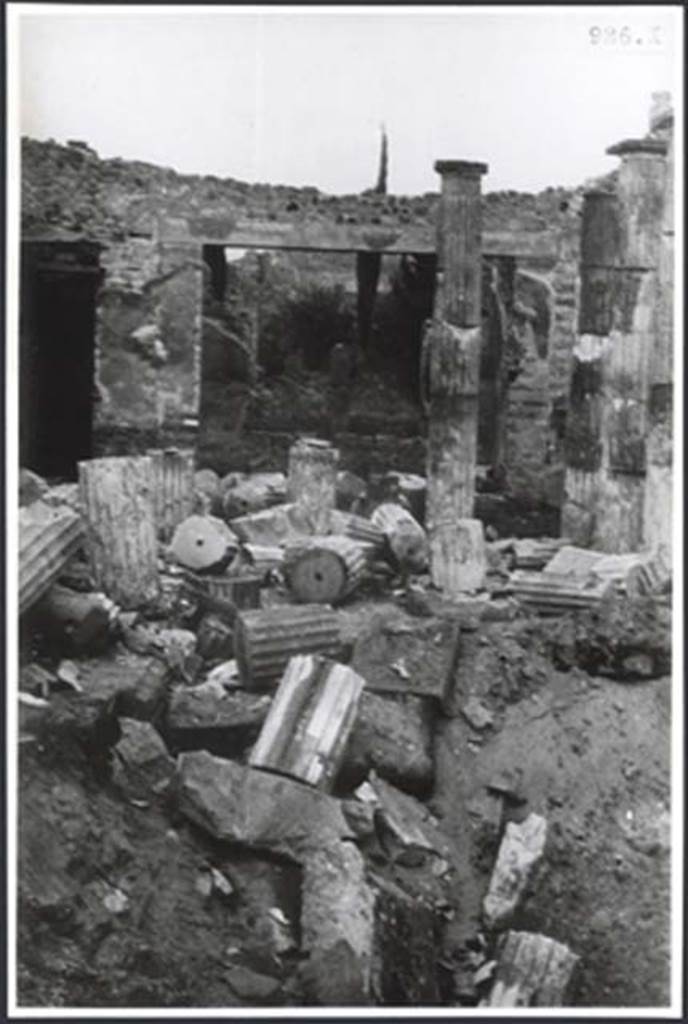
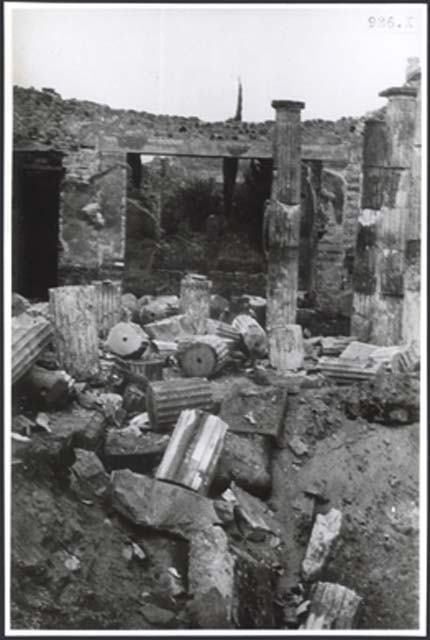
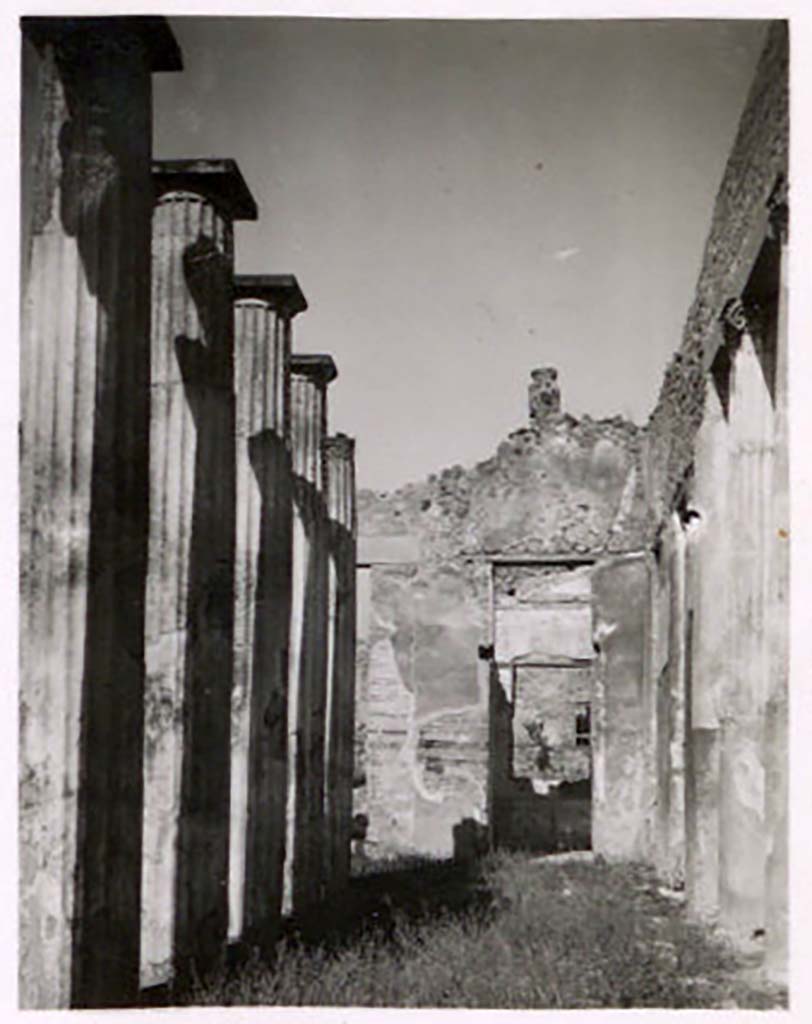
IX.1.20 Pompeii. c.1943-6. Room 2, atrium. Bomb damage.
According to Garcia y Garcia, this house was one of the most savagely damaged during one of the allied air raids in September 1943.
The great Corinthian atrium, hit in its centre in the middle of the impluvium, was completely annihilated, with the destruction of the impluvium and the cutting down of the sixteen tufa Doric columns.
The bombing also caused the demolition of the façade wall towards the Via dell’Abbondanza, including the fauces and the neighbouring rooms.
With the immediate restoration and by saving every little snippet, the columns were reconstructed, but it was only possible to restore a fraction of the facade.
See Garcia y
Garcia, L., 2006. Danni di
guerra a Pompei. Rome:
L’Erma di Bretschneider. (p.149-50)
Photo courtesy of British School at Rome Digital Collections.
IX.1.20 Pompeii. Atrium from entrance.
Photographed 1970-79 by Günther Einhorn, picture courtesy of his son Ralf Einhorn.

IX.1.20 Pompeii, 7th August 1976. Looking north across columns in atrium.
Photo courtesy of Rick Bauer, from Dr George Fay’s slides collection.

IX.1.20 Pompeii. 1966. Room 2, looking north across impluvium. Photo by Stanley A. Jashemski.
Source: The Wilhelmina and Stanley A. Jashemski archive in the University of Maryland Library, Special Collections (See collection page) and made available under the Creative Commons Attribution-Non-Commercial License v.4. See Licence and use details.
J66f0466

IX.1.20 Pompeii. 1966. Room 2, looking north across atrium. Photo by Stanley A. Jashemski.
Source: The Wilhelmina and Stanley A. Jashemski archive in the University of Maryland Library, Special Collections (See collection page) and made available under the Creative Commons Attribution-Non-Commercial License v.4. See Licence and use details.
J66f0296

IX.1.20 Pompeii. 1957. Looking north across impluvium in atrium. Photo by Stanley A. Jashemski.
Source: The Wilhelmina and Stanley A. Jashemski archive in the University of Maryland Library, Special Collections (See collection page) and made available under the Creative Commons Attribution-Non-Commercial License v.4. See Licence and use details.
J57f0102

IX.1.20 Pompeii. 1940. Looking north into atrium. Photo courtesy of Rick Bauer.
IX.1.20 Pompeii. W.333. Looking north across atrium.
Photo by Tatiana
Warscher. Photo © Deutsches Archäologisches Institut, Abteilung Rom, Arkiv.

IX.1.20 Pompeii. Album by M. Amodio, c.1880,
entitled “Pompei, destroyed on 23 November 79, discovered in 1748”.
Looking north across atrium. Photo courtesy of
Rick Bauer.
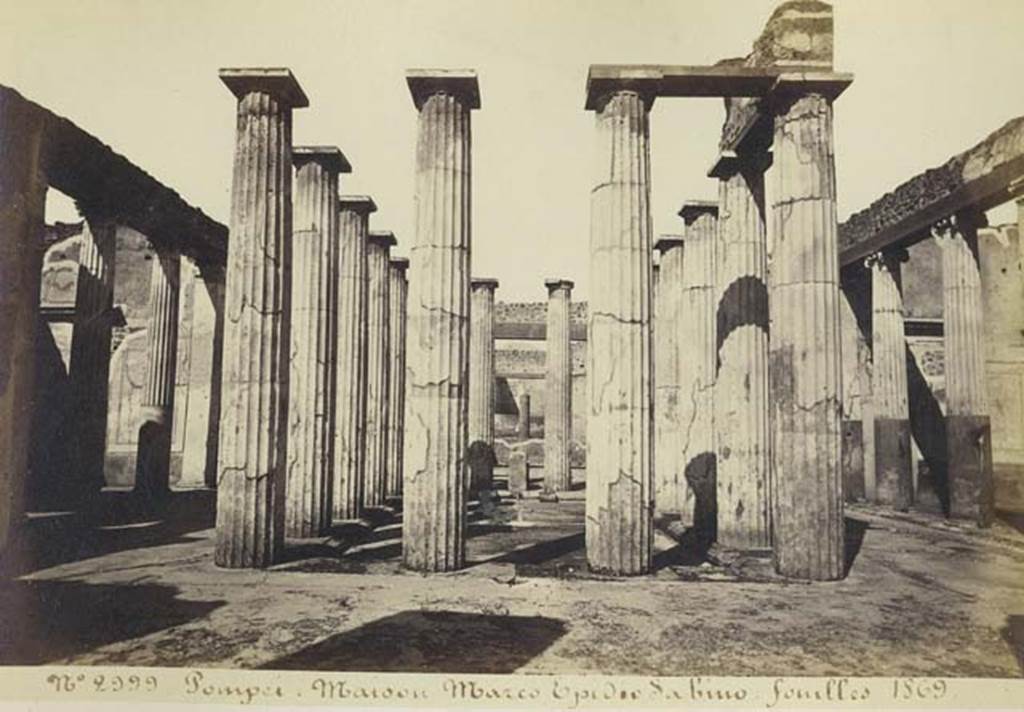
IX.1.20 Pompeii.
Old undated photograph by Amodio, numbered 2999 in an album dated c.1873. Looking north across atrium. Photo courtesy of Rick Bauer.
IX.1.20 Pompeii. Pre-1943. Photo by Tatiana Warscher.
Room 2, atrium, looking east across atrium towards doorway to (our) room 5, Warscher wrote that “only a small part of the epistyle remained.”

IX.1.20 Pompeii. December 2006. Atrium and rooms 5 and 6 on east side.
XI.1.20 Pompeii, 4th December 1971. Looking
towards east side of atrium.
Photo courtesy of Rick Bauer, from Dr George Fay’s slides
collection.
XI.1.20 Pompeii. Pre-1943. Room 2, atrium, looking north along
east side. Photo by Tatiana Warscher.
IX.1.20
Pompeii. September 2019. Room 2, looking north along west side of atrium.
Foto
Annette Haug, ERC Grant 681269 DÉCOR

According to Dwyer, Fiorelli unsuccessfully tried to cast a victim here on 2nd March 1866.
He wrote –
“The bones of a human skeleton were uncovered in the corridor located between the second and third cubicula on the left of the atrium of the above-mentioned house, at the height of about one metre above the ground in the stratum of the compacted material, for which reason liquid gesso was introduced into the cavity that the body had left in the earth in order to recover the impression.”
On 3rd March he wrote –
“The skeleton uncovered yesterday did not yield a true impression because the earth had adhered to the bones in such a way that no cavity remained, and thus the gesso that was introduced was not able to set properly.”
See Dwyer, E., 2010. Pompeii’s Living Statues. Ann Arbor: Univ. of Michigan Press, (p.79).
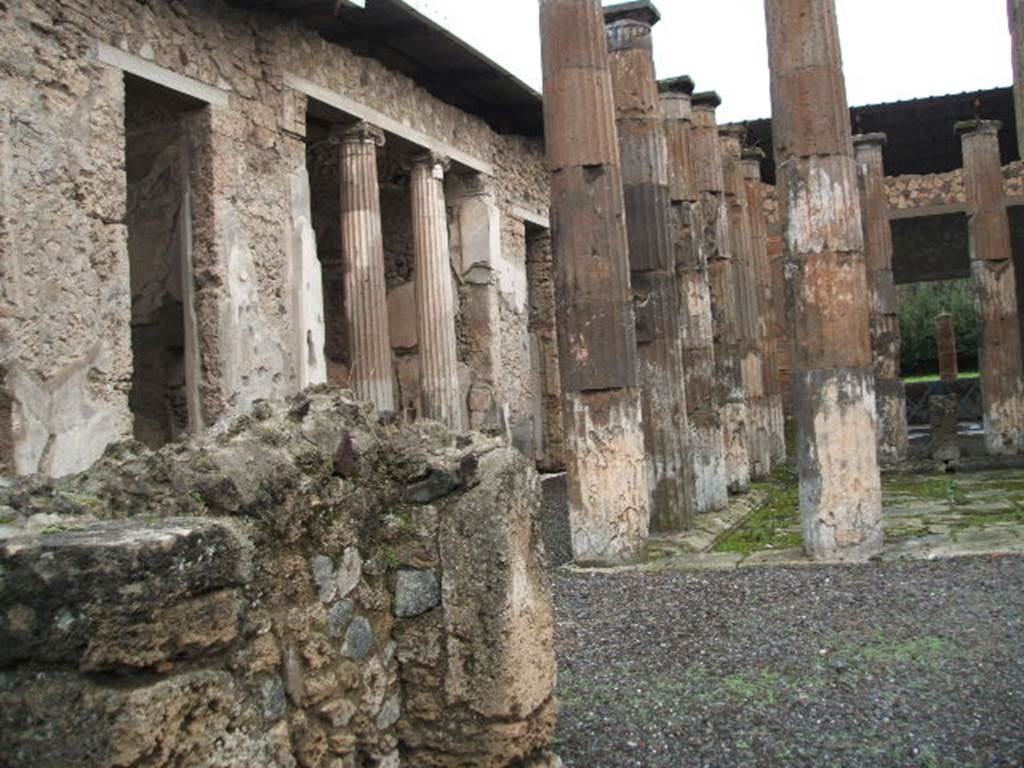
IX.1.20 Pompeii. December 2004. Room 2, atrium and rooms on west side.
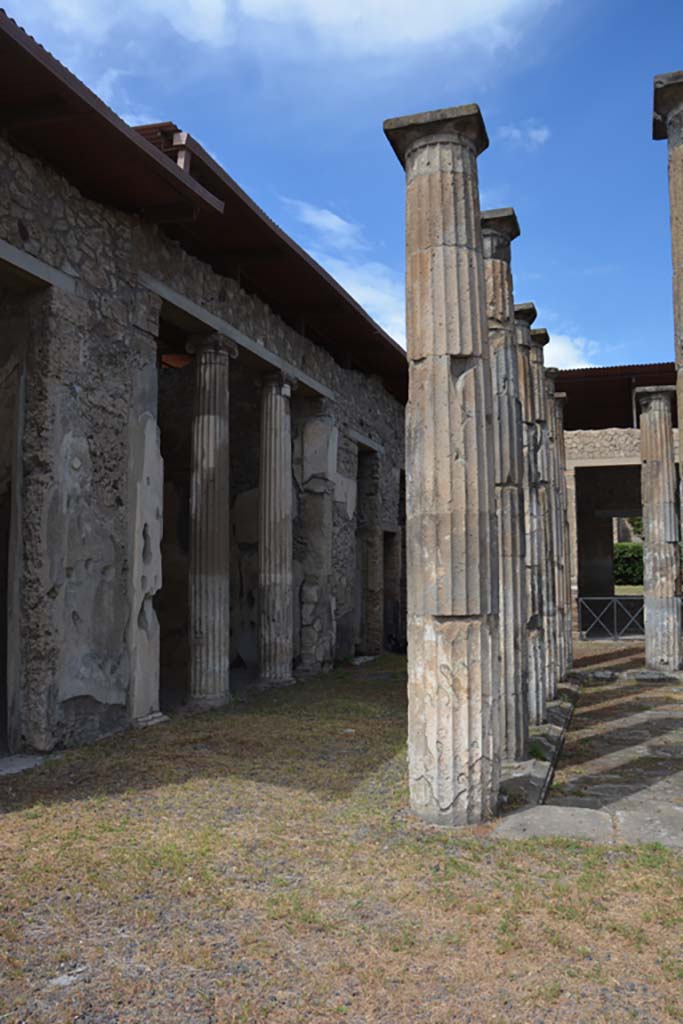
IX.1.20 Pompeii. September 2019. Room 2, looking north
along west side of atrium.
Foto Annette Haug, ERC Grant 681269 DÉCOR

IX.1.20 Pompeii. Pre-1943. Room 2, atrium, looking north along west side. Photo by Tatiana Warscher.
See Warscher, T. Codex Topographicus Pompeianus, IX.1. (1943), Swedish Institute, Rome. (no.78), p. 147.

IX.1.20 Pompeii. December 2007. Room 2, atrium. Looking south-east across impluvium towards doorway to room 3, centre right.
Part 1 Part 2 Part 3 Part 4
Part 5 Part 6 Plan